How to Install and Activate a Sim Local eSIM on iPhone and Android
Installing a Sim Local eSIM involves two main tasks: adding the mobile profile to your phone, then choosing the correct settings so the phone can use the plan. Once you separate those tasks, the process is much easier to follow.
Choose your setup route
You can use the Sim Local app where supported, scan the supplied QR code, or enter the manual activation details. The right method depends on your phone and the instructions attached to the package you bought.
This walkthrough covers iPhone, Samsung Galaxy, and Google Pixel, along with the arrival settings that are easy to miss. Menu wording can vary by software version and region, so a slightly different label does not necessarily mean you are in the wrong place.
Keep the installation information for your exact purchase available throughout. Sim Local sells several providers' products, and their activation requirements are not identical.
Affiliate disclosure: We may earn a commission from purchases through our links, at no extra cost to you.
Before You Start: Check These Essentials
Confirm the Exact Phone Is Compatible
Check the model and regional version against the manufacturer's specifications and Sim Local's compatibility guidance. A phone supporting 5G does not automatically establish that it supports downloadable eSIM profiles.
The presence of an Add eSIM option is helpful, but compatibility also depends on the device variant and any restrictions. If the option is missing, investigate before buying another plan or repeatedly trying a QR code.
Make Sure the Phone Can Use the Provider
A carrier-locked phone may reject a plan from another provider. On iPhone, check Settings, General, About, and the Carrier Lock or Network Provider Lock entry. If it shows No SIM restrictions, the phone is unlocked.
For Android, check with the carrier that supplied the device if unlock status is unclear. A different activation method cannot override a carrier lock.
Use a Stable Internet Connection
Downloading the eSIM profile requires a working connection. A dependable home or accommodation Wi-Fi network is usually easier to work with than a crowded airport network that keeps returning to a sign-in page.
Keep the phone charged and allow the installation to finish. Avoid switching apps unnecessarily or disconnecting while the profile is downloading.
Have the Full Order Information Ready
You may need the QR code, manual details, and an additional confirmation code. Some Three products sold by Sim Local require a four-digit code delivered with the purchase instructions.
Do not confuse that code with your phone's screen-lock passcode or a bank verification code. Use the information supplied specifically for the eSIM installation.
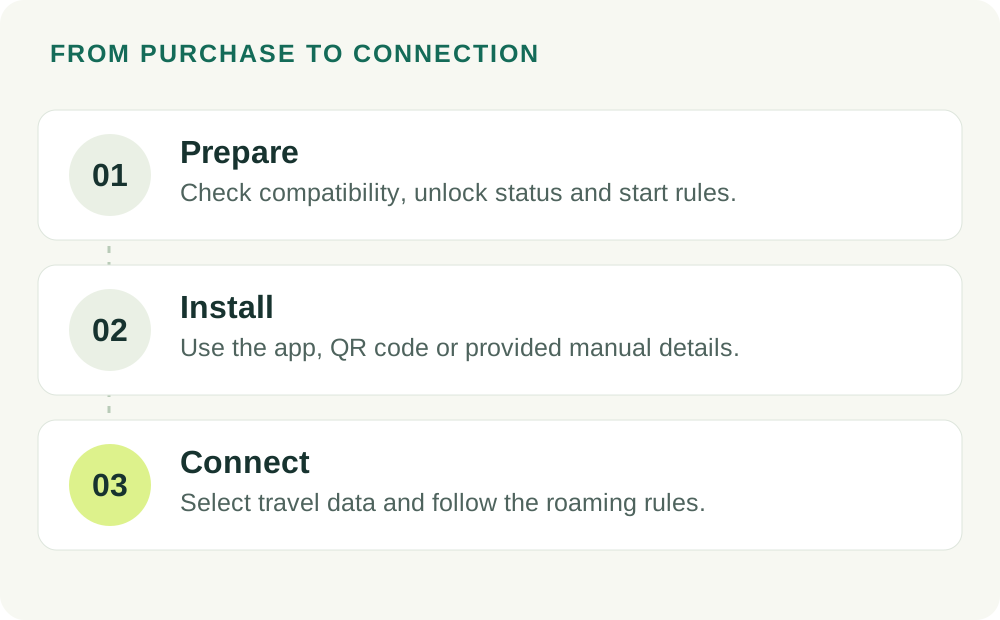
Understand Installation and Activation
Installation Adds the Profile
Installing downloads the eSIM credentials onto the phone. Once completed, the new line should appear in the phone's SIM or mobile-service settings.
That visible profile is evidence that the installation occurred. It does not necessarily mean the travel plan has connected to a supported network or started providing internet access.
Activation Starts the Service Under the Plan's Rules
Many travel packages begin when they first connect in a covered destination. Others have additional conditions, such as an automatic activation deadline after purchase.
For example, Sim Local's Europe Unlimited Pro seven-day product starts on its first destination-network connection, or automatically 60 days after purchase if it has not connected earlier. That is a rule for that product, not a universal instruction for every Sim Local eSIM.
Read the package before deciding how early to install. Turning off the line afterward does not necessarily reverse an activation that has already occurred or pause an active validity period.
Method One: Install Through the Sim Local App
- Install or open the Sim Local app on the phone that will use the eSIM.
- Sign in with the email address used for the purchase, or follow the account instructions associated with the order.
- Open My eSIM and choose the correct plan.
- Select Install Plan and then Download Plan where those options are offered.
- Follow the phone's prompts to add the mobile plan.
- Wait until the installation completes, then check that the new line appears in the phone settings.
Sim Local's iPhone one-click installation guidance specifies iOS 17.4 or later. If direct installation is unavailable for your setup, use the QR or manual method provided with the order.
Install the profile only on the device intended to use it. Adding it to a different phone as a test can make later installation on the traveller's phone difficult or impossible without support.
Method Two: Install on iPhone Using a QR Code
- Connect the iPhone to a stable internet connection.
- Open Settings and select Cellular, Mobile Data, or Mobile Service.
- Tap Add eSIM.
- Choose Use QR Code when offered.
- Scan the QR code supplied for your purchase.
- Enter any eSIM-specific confirmation code requested by the instructions.
- Follow the prompts to add the plan and wait for completion.
Displaying the QR code on a laptop, tablet, or another phone makes scanning straightforward. If the code is only on the same iPhone, use an available direct-install option or the manual details rather than struggling to scan your own screen.
Some software versions support additional ways to open an eSIM QR code from an email or image. Use those only when the device presents the appropriate eSIM installation action.
After installation, check the list of SIMs. The new line may initially be called Secondary, Travel, or another generic label. Rename it before changing the data settings.
Method Three: Install on Samsung Galaxy
- Connect the Galaxy phone to a working internet connection.
- Open Settings, then Connections.
- Open SIM manager.
- Select Add eSIM.
- Choose Scan QR code and scan the code from your order.
- Follow the prompts, including any confirmation-code requirement.
- Wait for the profile to finish downloading and confirm that it appears in SIM manager.
Samsung menu labels can differ across models and software versions. If your device does not show the expected eSIM option, confirm support for the exact regional model instead of assuming every Galaxy phone uses the same hardware features.
If the phone requests a restart to finish applying the profile, complete it. Then return to SIM manager and verify the new line before moving to the mobile-data selection.
Method Four: Install on Google Pixel
- Connect the Pixel to a reliable internet connection.
- Open Settings and then Network & internet.
- Select SIMs and choose Add SIM.
- Choose Set up an eSIM, or the equivalent download-an-eSIM option shown on your version.
- Follow the prompts to scan the supplied QR code or enter the activation information.
- Complete the setup and confirm that the travel profile appears in the SIM list.
Pixel software may present a provider-selection step before scanning or downloading. Follow the option appropriate to the supplied eSIM rather than using a transfer workflow intended for an existing mobile line on another phone.
Once the profile is added, the phone still needs to know which SIM should carry mobile data. Complete the arrival settings below before testing the connection.
Manual Installation When Scanning Is Inconvenient
Manual setup is useful when the QR code cannot be scanned or you do not have a second screen. Use the activation details supplied by Sim Local for that purchase.
On iPhone, the QR setup screen can offer Enter Details Manually. The fields may include an SM-DP+ address, activation code, and a confirmation code if required.
Android may ask for a complete activation string or provide its own manual-entry option. Copy the supplied format exactly. Do not split, shorten, or combine values unless the instructions tell you to do so.
Check for spaces introduced during copying. If the details are rejected, confirm that the profile is not already installed before trying another method.
Keep these credentials private. Someone helping you should not need them posted in a public forum or review. Share sensitive installation information only through official support channels when necessary.
Label the Travel Line Clearly
A clear name prevents mistakes later. Use something such as Sim Local Europe, UK Travel, or USA Data rather than leaving two lines with nearly identical labels.
On iPhone, open the line under mobile-service settings and change its Mobile Plan Label. On Android, use the name or label controls available for that SIM.
Keep the home line labelled clearly too. The goal is to make data, roaming, and call settings understandable at a glance when you are tired after a flight.
Choose the Travel eSIM for Mobile Data
On iPhone, open the Cellular or Mobile Data settings, select the mobile-data option, and choose the travel line. Turn off Allow Cellular Data Switching or the equivalent setting if you do not want automatic fallback to your home data line.
On Samsung, use SIM manager to choose the travel SIM for mobile data. On Pixel, open the SIM settings and select the travel line for the relevant data preference.
Some Android devices offer automatic data switching or backup-data features. Review those settings so the phone does not quietly use another line when the travel connection weakens.
Data selection and voice selection are separate. Choosing the travel line for internet access does not automatically mean every normal phone call will use it.
Set Data Roaming on the Correct Line
Follow the purchased plan's instructions for roaming. Sim Local's travel setup guidance generally calls for enabling data roaming on the travel eSIM so it can use supported partner networks.
Keep data roaming disabled on the home SIM unless you deliberately want to use its roaming service. The two lines have separate controls and separate billing arrangements.
If you do not need home calls or SMS during the trip, turning off the home line is the simplest way to avoid using it accidentally. If you keep it enabled, review your carrier's voice, text, and other roaming charges.
Turning off home-line data roaming does not guarantee that every possible activity on that line is free. Ordinary calls, sent texts, and some service behaviours can still be subject to the home carrier's terms.
Set the Voice Line if Your Plan Includes Calls
If the package includes native voice service, select it as the default calling line when appropriate. Check the line shown before making a call, particularly for contacts or recent calls that may remember an earlier selection.
If the package is data only, use your usual internet-calling apps over the data connection. A data-only plan does not create a native voice allowance merely because the phone displays a second SIM.
You generally do not need to change your existing messaging-app account number just because the mobile-data connection changes. Keep the account setup you intend to use and retain access to verification methods.
Test the Connection After Arrival
First, confirm that you are in a country included in the package. Then enable the travel line and apply its required data settings.
Give the phone time to register. Sim Local notes that an activation status can sometimes remain in progress for up to ten minutes. Repeatedly removing and reinstalling the profile is not a useful first response.
Temporarily turn off Wi-Fi, then open a lightweight webpage or send a simple message. This confirms whether mobile data is working, rather than accidentally testing the airport's Wi-Fi connection.
Check that the travel line is the selected data source. You want to confirm the new plan, not unintentionally prove that the home SIM can roam.
Once the test succeeds, turn Wi-Fi back on when useful and check the plan's remaining allowance. A small practical test is enough; repeated speed tests can consume unnecessary data.
If the Phone Says Activating Before You Travel
An installed travel profile may not finish registering while you are outside its supported service area. The phone's status message alone does not establish that the purchase has failed.
Check whether the profile is visible in the SIM list. If it is, keep it installed and follow the plan's instructions for use at the destination.
If the package requires an immediate action or additional code, complete that step as instructed. Do not assume every product is waiting for arrival simply because many travel eSIMs work that way.
If the eSIM Installs but Has No Internet
Check the selected data line, the travel line's enabled status, roaming settings, destination coverage, remaining balance, and validity. Those checks resolve different causes without deleting the profile.
If an APN needs attention, use the value supplied for the actual provider. Sim Local sells several products, so there is no single APN that should be copied onto every purchase.
Restarting the phone after checking the settings can help it reconnect. If the issue continues, follow the full troubleshooting sequence: Sim Local troubleshooting guide
What to Do When You Return Home
Choose the home SIM for mobile data again and restore the normal voice preference if you changed it. Turn off the travel line if you no longer need it.
Keep the eSIM installed until you know whether it can be reused or topped up. Deleting a profile can be permanent for many travel products, even if its original QR code is still in your email.
Remember that disabling an eSIM does not necessarily cancel a subscription or stop an account-level renewal. If you deliberately purchased any recurring service, manage that through the relevant account settings.
Installation FAQs
Can I install the same eSIM on two phones?
Do not assume that is possible. Travel eSIM profiles are generally intended for one device, and transfer or reinstallation depends on the provider. Buy separate suitable plans if both phones need independent service.
Should I delete my home SIM?
No. You can select or disable lines without deleting the home profile. Removing it creates an unnecessary recovery task and is not part of normal travel-eSIM setup.
What if the QR code says it has already been used?
Look for the installed profile first. The code may have already completed its job. If the profile is absent or the installation remains unclear, contact support before buying again.
Do I need to change the APN immediately?
Not unless the plan's instructions require it or troubleshooting identifies a problem. Many configurations are supplied automatically, and an incorrect manual change can prevent a working profile from connecting.
Ready for the First Connection
Install on the intended device, keep the correct plan instructions available, and clearly label the new line. At the destination, select it for mobile data and follow its roaming requirements.
Those steps give you a controlled setup and make any troubleshooting much easier. If you still need a package, compare your options here:
Browse Sim Local plansOfficial Sim Local activation guide: https://www.simlocal.com/support/esim-activation-guide
Try ESIMDUDE10 for 10% off an eligible purchase. Confirm the discount before payment.
ESIMDUDE10